We’re starting our fifth week of the archaeological field study in Boeotia now, and I’ve since been designated the “scarp-master” of the trenches by none other than Sam Bartlett herself; a title I don’t take lightly. You might be asking yourself now what on earth a “scarp” might be. When a trench is dug within an archaeological context, the walls within the trench, which show the stratigraphic layers of sediment, are known as the scarp. There are a multitude of reasons why the upkeep of a clean scarp is absolutely necessary, with the retention of a pleasing aesthetic being first and foremost. Photographic records are constantly being taken during the excavation process in order to properly recall what a trench looked like at any particular moment. The upkeep of a clean scarp in turn provides the viewer with an accurate, and easily viewable representation of the trench in question, so to properly recall the context.
As you might expect, the tools you use to scarp play an important role in the quality of the finished product. A large pick for example, is far too cumbersome and inaccurate in removing the correct amount of soil, while the standard trowel is often too delicate to remove enough soil. In my recent experience, I’ve found that the hand pick gives some of the best results to receive a nice 90° face in the first step of your scarping efforts, as it removes a substantial amount of soil while still retaining a fair amount accuracy; the surface it leaves is often uneven though. Be sure in your endeavours to use only the pointed end of the hand pick unless otherwise specified, as the broad end has the rife potential of damaging any artifacts within the soil. Along with the hand pick are two other tools which have been deemed by the excavation team as the scarpinator (fig. 1), and the laser beam (fig. 2) to further refine the scarp.


As their respective names may suggest, both tools yield an incredibly flat surface due to their broad, sharp ends which work excellent for scraping soil away for the finishing touches. The nature of their handles ensures that an excess of force cannot be applied so to damage any artifacts, providing the user with an ease of mind.
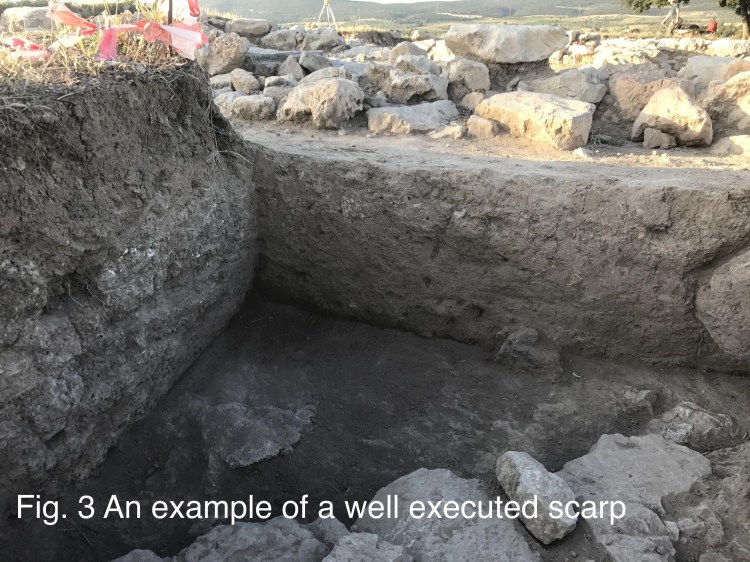
The process of how to execute a clean, flush scarp appears relatively simple on paper, but once faced with the task, the practice has the potential to be more difficult than it needs to be. Many an amateur archaeologist’s first instinct is to start working on the face of the wall head on, but this perspective often makes achieving a 90° wall face very difficult to accomplish. My advice is to tackle it from above, working on it looking downward, as this gives the most precise perspective to retain accuracy (Fig. 3). If the trench becomes too deep and working on it from above is no longer an option, I advise to regularly step out and look down at the wall face to get a sense of accuracy.
These tricks of the trade have lead me to execute some very nice trench walls, and I hope they may aid you in any your excavation endeavours. Happy scarping!
